- Define exposure and sheen
- Coordinate slab and polishing teams
- Approve representative mockup
Reddit discussions identify questions; technical guidance comes from the linked primary sources. This article is not a site inspection or an engineered specification. How we research.
A new slab intended to remain exposed is already becoming the finished floor on pour day. Decisions about mixture, placement, flatness, joints, curing, and protection influence what the polishing contractor later encounters.
A Reddit discussion about finishing a slab before grinding produced conflicting recommendations. That is predictable when the desired aggregate exposure and polishing system are not fully defined. The solution is a coordinated specification before placement, not a universal instruction to trowel more or less.
Describe two different appearance choices
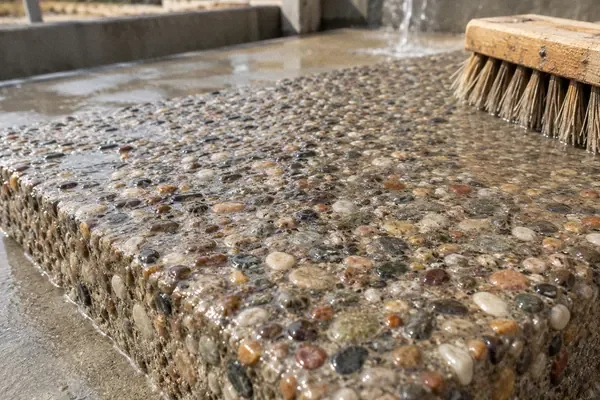
First identify the intended aggregate exposure: a cream-dominant surface, fine aggregate, or more substantial coarse aggregate. Then identify the desired sheen and other appearance requirements.
The Concrete Polishing Council's aggregate-exposure chart separates exposure classes and explains that mixture, placement, and finishing influence the result. Use current terminology rather than relying on an ambiguous phrase such as “polished like the picture.”
A shiny surface can still have a different aggregate pattern from the owner's reference. Conversely, the desired exposure does not automatically establish the preferred sheen.
Do not specify only a grit number
A sequence of abrasives describes part of a method, not the whole finished appearance. The CPC discussion of classes and levels explains why defining the result is more useful than relying only on steps and grits.
Ask the polishing contractor how the proposed system will achieve and evaluate the selected appearance. Where measurable requirements apply, identify the relevant method and acceptance process.
For an owner, this makes bids easier to compare. Two proposals naming the same final grit may still describe different exposure, preparation, or protective systems.
Bring the placing contractor into the conversation
The slab contractor needs to know the floor will be polished and what result is expected. Do not wait until after placement to introduce the polishing team.
Discuss mixture, reinforcement details, placement sequence, flatness requirements, edge work, curing products, and construction protection. The responsible designer should coordinate requirements that affect the slab's function.
The ASCC article on specifying a slab to be polished emphasizes preconstruction coordination and representative mockups. The practical lesson is to test the combined process rather than approve each trade independently.
A hypothetical cream-finish floor
Suppose an owner selects a photograph with little visible coarse aggregate and a restrained sheen. The general contractor orders an ordinary slab and plans to ask a polishing company to reproduce the image later.
A pre-pour review identifies that the photograph's appearance requires more deliberate coordination. The team specifies the desired exposure and appearance, discusses the slab requirements, and makes a representative mockup.
The owner discovers that a slightly different exposure is more realistic for the proposed materials and budget. Making that decision before placement is much easier than discovering it after aggressive grinding has exposed particles the owner did not expect.
This example is not a promise that every desired appearance is achievable. The mockup exists partly to test that assumption.
Make the mockup meaningful
| Feature | Why include it |
|---|---|
| Actual mixture | Represents the available aggregate and matrix |
| Placement method | Shows the real slab-construction process |
| Edge work | Reveals differences near walls and boundaries |
| Joints | Shows their appearance in the finished floor |
| Curing system | Tests compatibility with later processing |
| Polishing system | Establishes the intended exposure and sheen |
| Representative timing | Avoids comparing unlike construction sequences |
A tiny polished sample made in different conditions may communicate color but not the full floor behavior. Agree on a suitable mockup scope with the project team.
Record what the owner approves and any acceptable variation. Keep that reference available during construction.
Plan joints as part of the visible design
Joints remain functional construction details even when the surface becomes decorative. Coordinate their layout with the architecture and polishing work rather than attempting to hide them by assumption.
Discuss how transitions, columns, and doorways affect the visual field. A joint arrangement that was never shown to the owner can become an avoidable aesthetic dispute.
Do not omit required joints solely to obtain an uninterrupted photograph-like surface. Any alternative design needs the appropriate professional evaluation.
Protect the slab before polishing
Other trades may stain, mark, chip, or contaminate a slab that will remain visible. Establish a construction protection plan before those activities begin.
Identify permitted coverings, storage restrictions, and responsibility for damage. Protection should be compatible with the concrete and selected system, not improvised from whatever material is nearby.
Keep the polishing contractor informed about anything applied to the slab. A product used casually for temporary protection can become a later preparation issue.
Set expectations for variation
Concrete is not a printed pattern. The selected exposure may reveal variations in aggregate distribution and construction details. A representative mockup helps make those characteristics visible.
Avoid promising exact reproduction of a floor made with different materials. Instead, define the selected class, appearance, sample, and evaluation process.
The practical action is to make the finished-floor decision before the slab order. When placement and polishing work toward the same documented result, the owner has a clearer basis for approving both the process and the outcome.
Assign responsibility between trades
Ask the project team to identify who owns the slab between placement and polishing. The answer should cover temporary storage, access by other trades, cleanup, and reporting accidental spills or marks. Without that handoff, each contractor may assume the other is protecting the future finished floor. A named responsibility and simple site rules make the coordinated specification useful during actual construction.
Frequently asked questions
Does a high final grit guarantee the reference appearance?
No. Exposure, sheen, substrate, and the complete system all matter.
Should the crew trowel as much as possible?
Not by default. Agree on the slab finish with the polishing team and validate the combined process in the mockup.
Research references
- primary · search-excerpt
CPC Aggregate Exposure Chart February 2024 - primary · search-excerpt
CPC How to Use Classes and Levels to Specify Polished Concrete - primary · search-excerpt
ASCC Specifying the Concrete Slab to Be Polished - reddit · search-excerpt
Ideal slab finish that will be ground to expose aggregate